Compute Shaders for character customization
Introduction
When you're a solo developer you kind of learn to become a jack of all trades - you're forced to create your own models, textures, sounds, etc.
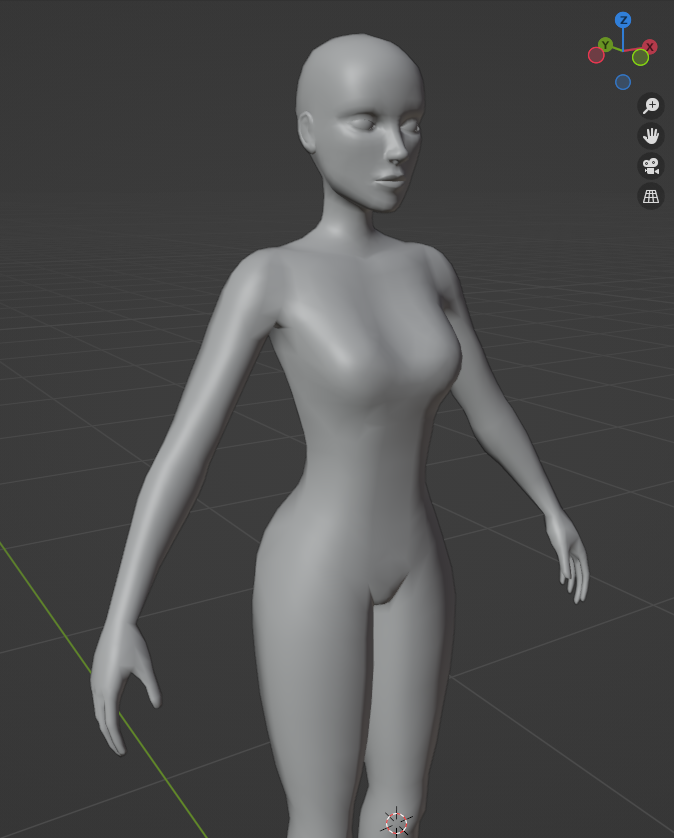
I'm admittedly a bit rubbish at some of these practices, so imagine my surprise when I managed to make a character model that I can be proud of:
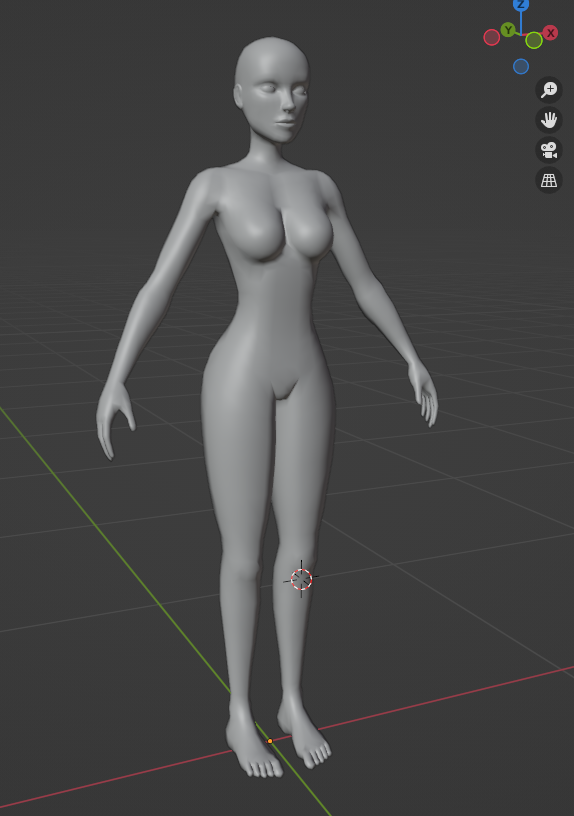
Now, this had me thinking, one thing that I think many games can't get quite right is body shapes. Some do it really well - like Saints Row 2 having a slider for gender, so you can be a man, a woman or anything in-between, and Sims 4 letting you pick a masculine or feminine body frame and tweak body proportions as you wish.
Inspired by this, I set out to try and "morph" this mesh into a masculine frame, by flattening the chest, moving vertices around, etc.

It's not perfect, but there is a lot of potential there.
This had me thinking - How would a system work, where you can have as many body mods and shapes as you want to, without having to recreate the shape keys in every single article of clothing, without it looking terrible or resorting to bone deltas?
The Idea
So, first thing that comes to mind are UV Maps. In Blender it's relatively easy to transfer UVs from one mesh to another - it is of course an approximation, vertices are loosely projected onto the target mesh but with minimal tweaking it'd be very acceptable for a morph system, one would have to bake vertex and normal deltas into a texture and we're good! In theory as long as the UV Maps match, you can just have a single small texture for any given morph and it'd work universally, on all body shapes, all clothes, all accessories, etc.
The Implementation: Blender
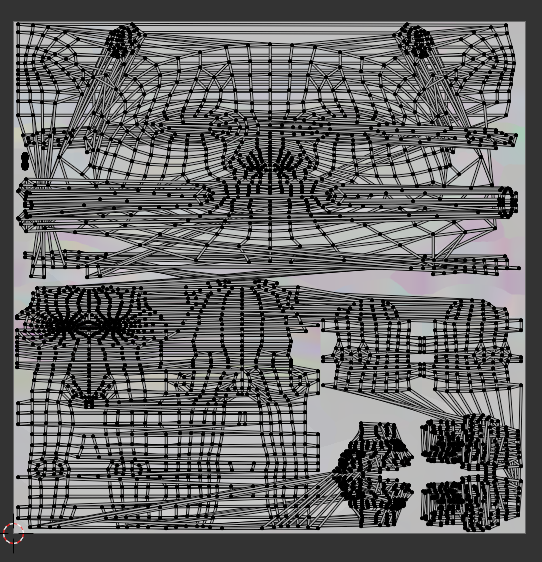
This is the UV Map that I had created for texturing:
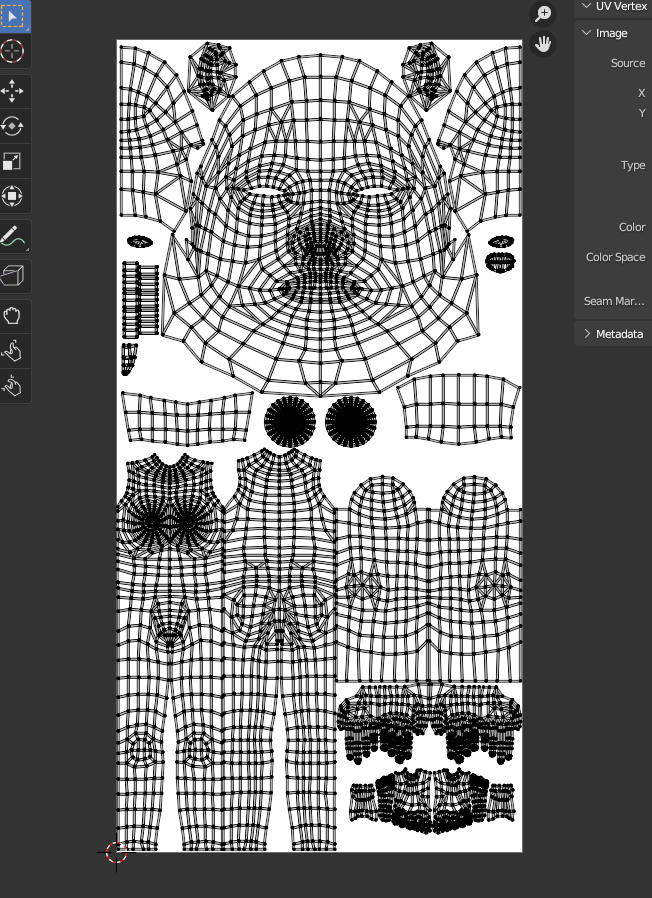
I'm honestly very proud of it - looks pretty, very neatly arranged in my programmer opinion. I could definitely work with this, just make the texture way smaller and increase the size of the morphable areas, like the face and body, to have the best morph resolution possible.
This was the result of that:
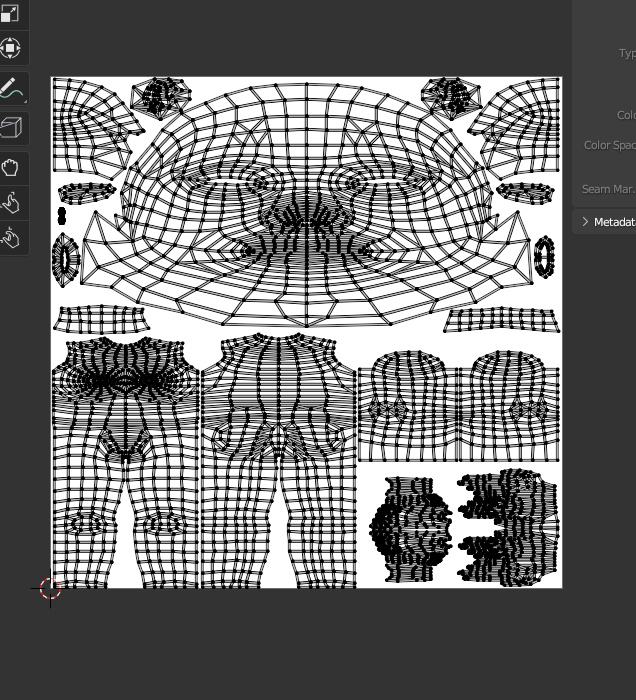
It's basically just a more compact version of the main UV, with some bits like the eyeballs, teeth and tongue removed as we are not going to be morphing those.
So this is now the second UV Map, which will be used for morphs.
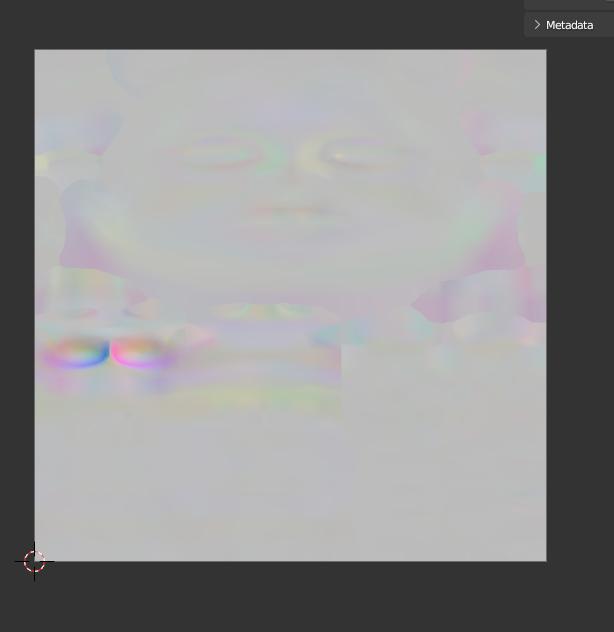
For the next step, using Blender's beautiful Python API, I wrote a couple of scripts that will grab the vertex deltas for all shape keys in the selected object, and encode and bake them into RGB vertex colors. As an example, here is what the encoding for the Masculine frame morph looks like:
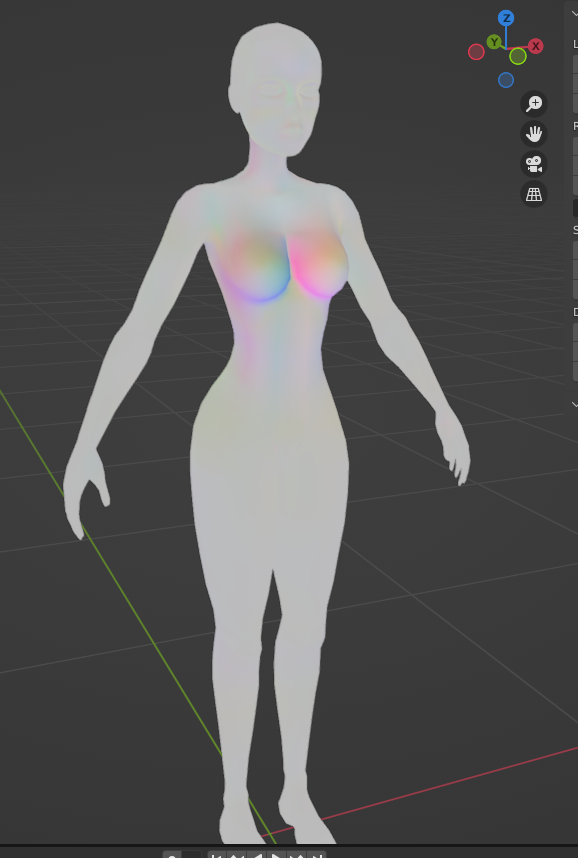
Logically the strongest colors are around the breasts, as they are drastically flattened to achieve the masculine frame.
After that, it was down to creating a little Material using Blender nodes, that will output the vertex colors as a Diffuse shader, and bake them into a texture. So this is what the resulting final morph texture looks like:
Just to test everything is OK, I wrote another little script that converts the output texture back into a shape key. Indeed, it worked fantastic, and there was virtually no difference between the texture based morph and the original shape key.
Finally it was time to write a normal delta converter. I won't bore you with the details - it's the same as the vertex morph texture, just with normal differences rather than vertex position ones.
The Implementation: Godot
Now, it was about time to test it in-engine.
In order to be able to test it quickly, I made a very rough, quick and dirty implementation in pure C#:
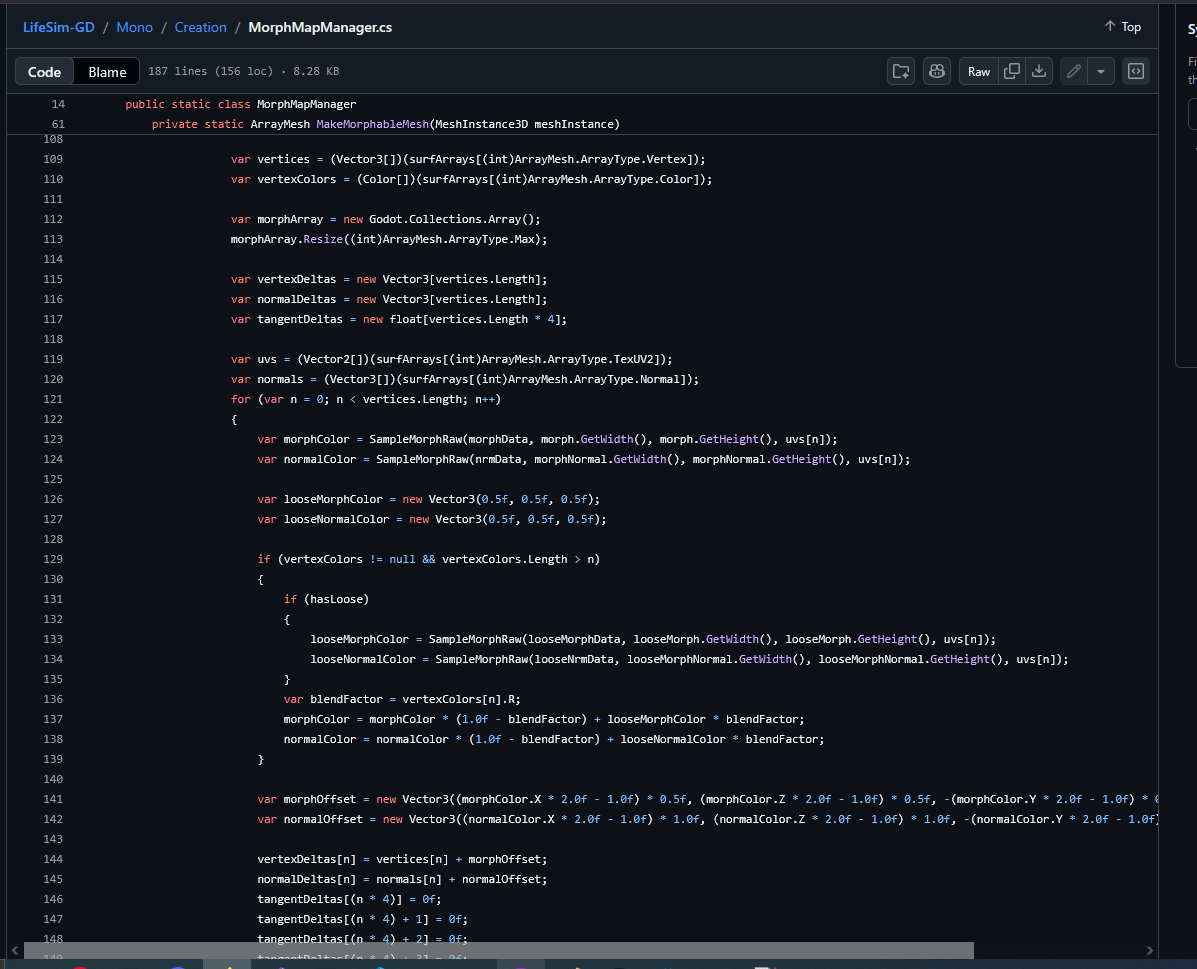
No optimization to speak of in that code. All it did was sample the deltas in each loaded morph texture and add them as blendshapes to the character's mesh.
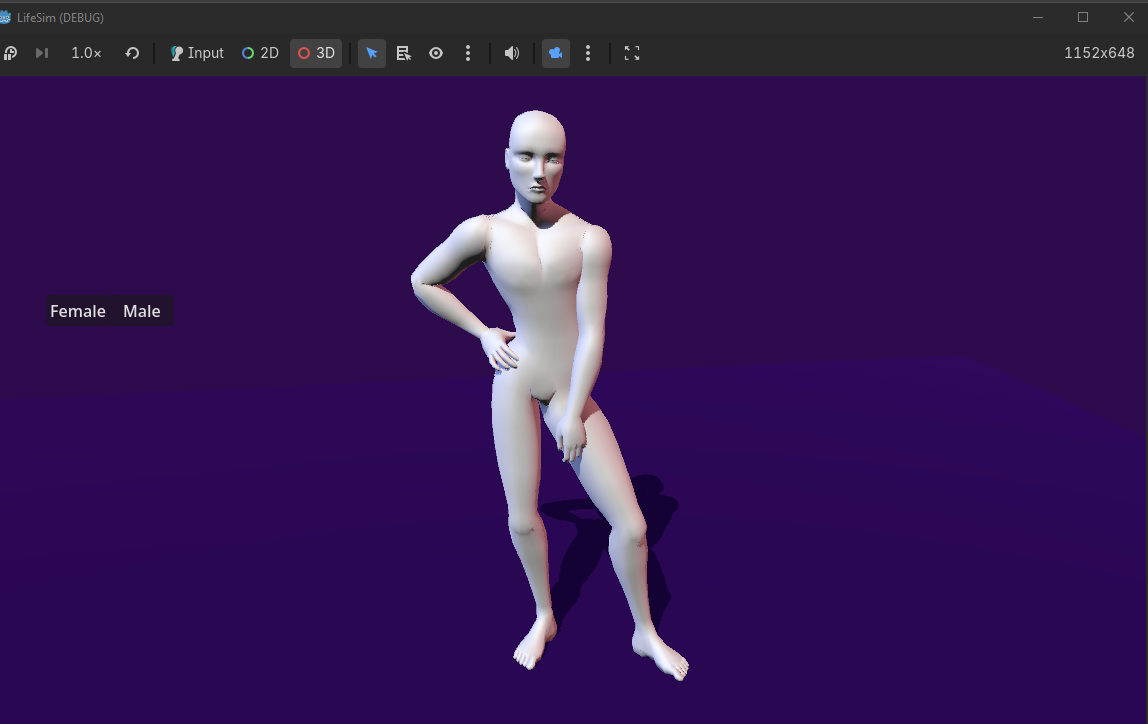
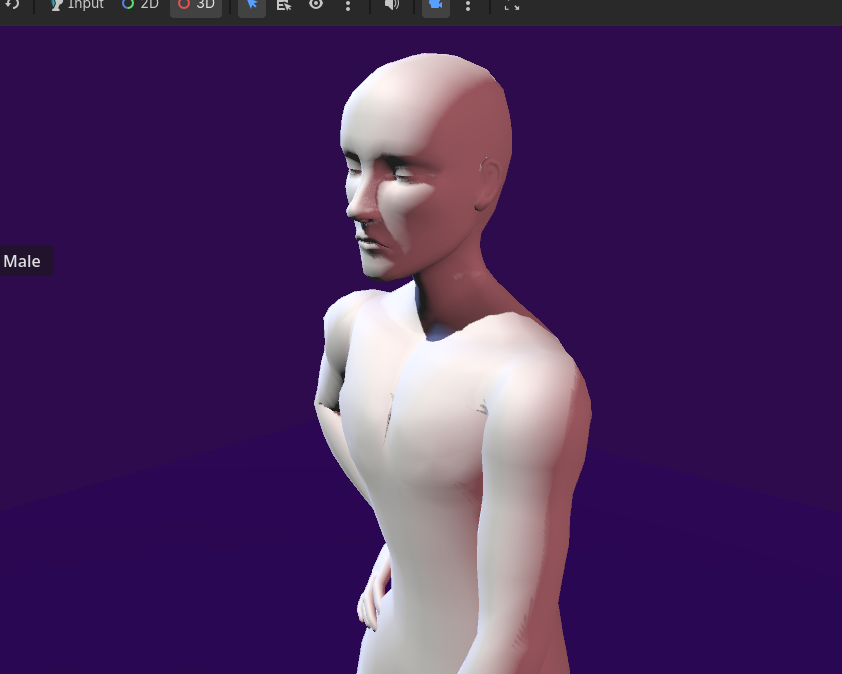
It worked perfect though:
Well, minus the fact that it takes forever to generate, and a number of odd tears in the mesh, where the UV seams are:
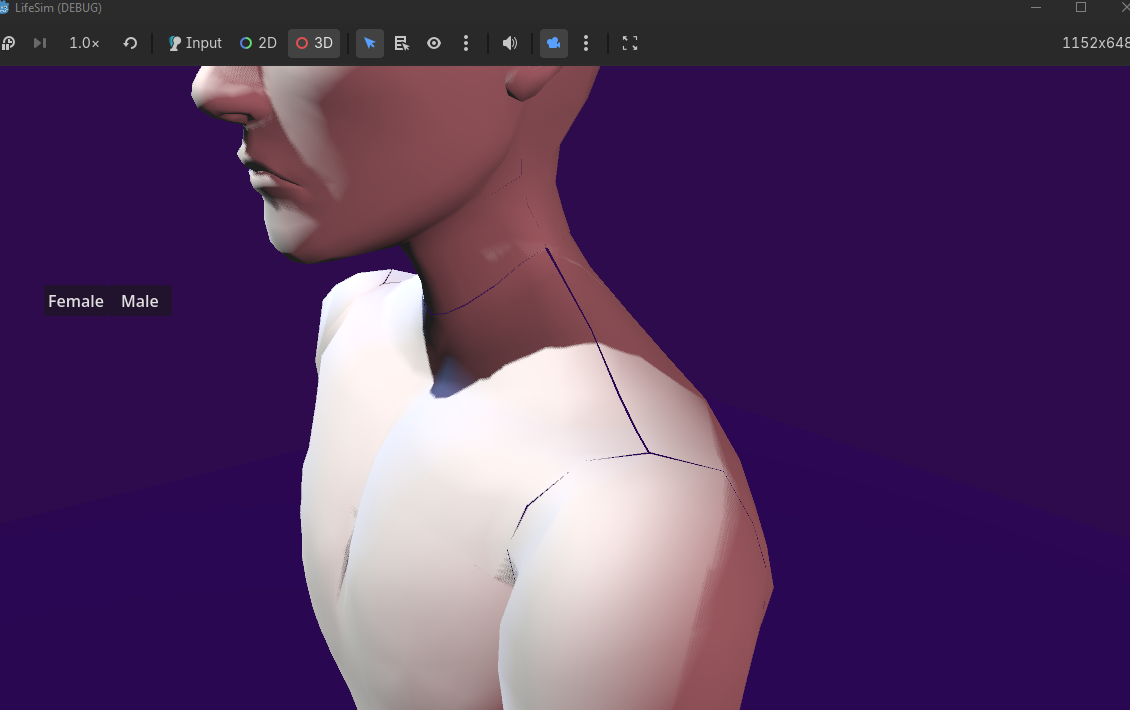
These gaps appear because, unlike in Blender, in most 3D engines and in the GPU itself vertices can't have multiple sets of UV coordinates and other attributes. So at export time, meshes are split wherever there are normal or UV seams present. Combined with the imprecisions of sampling the pixels at different areas, these gaps are created.
The solution seemed pretty straightforward to me - simply make a Blender script that grabs the UV and automatically snaps the UVs of vertices that are at the same location to eachother. This will make for a HORRIBLE looking UV Map, but would work perfect for our purposes as it'd seal the gaps.
After some quick python code, here is the final Morph UV Map:
It's not pretty, but due to the fact that we are using it as a per-vertex morph map rather than sampling it as a texture with linear interpolation across triangles all the stretching really doesn't matter. All that matters are the positions of the vertices themselves!
There we go!
Now the only remaining issue is the fact that it takes about 5 business days to generate the morphed mesh. Let's tackle that next.
Optimization
The obvious next step was to turn the algorithm into a shader - GPUs have thousands of cores and are extremely efficient at sampling textures and doing work in parallel.
My first idea was as follows to create a vertex shader that samples the morph and morph normal textures with UV2 and applies the delta to each shader - simple, fast, would just have to take place before skinning and with another custom shader that runs as a sort of "compositor" step to make the final morph textures with all relevant morphs combined.
This is when I found out that Godot applies skinning and blend shapes in a compute shader, before any rendering is done, which means that by the time vertex and fragment shaders run the model is already skinned. This is bad, because the position of each vertex has obviously changed by then so the morph deltas would be nonsensical.
So yeah, I bit the bullet, and went on to do research on compute shaders.
The Final Implementation
So, off I went to check the docs and...
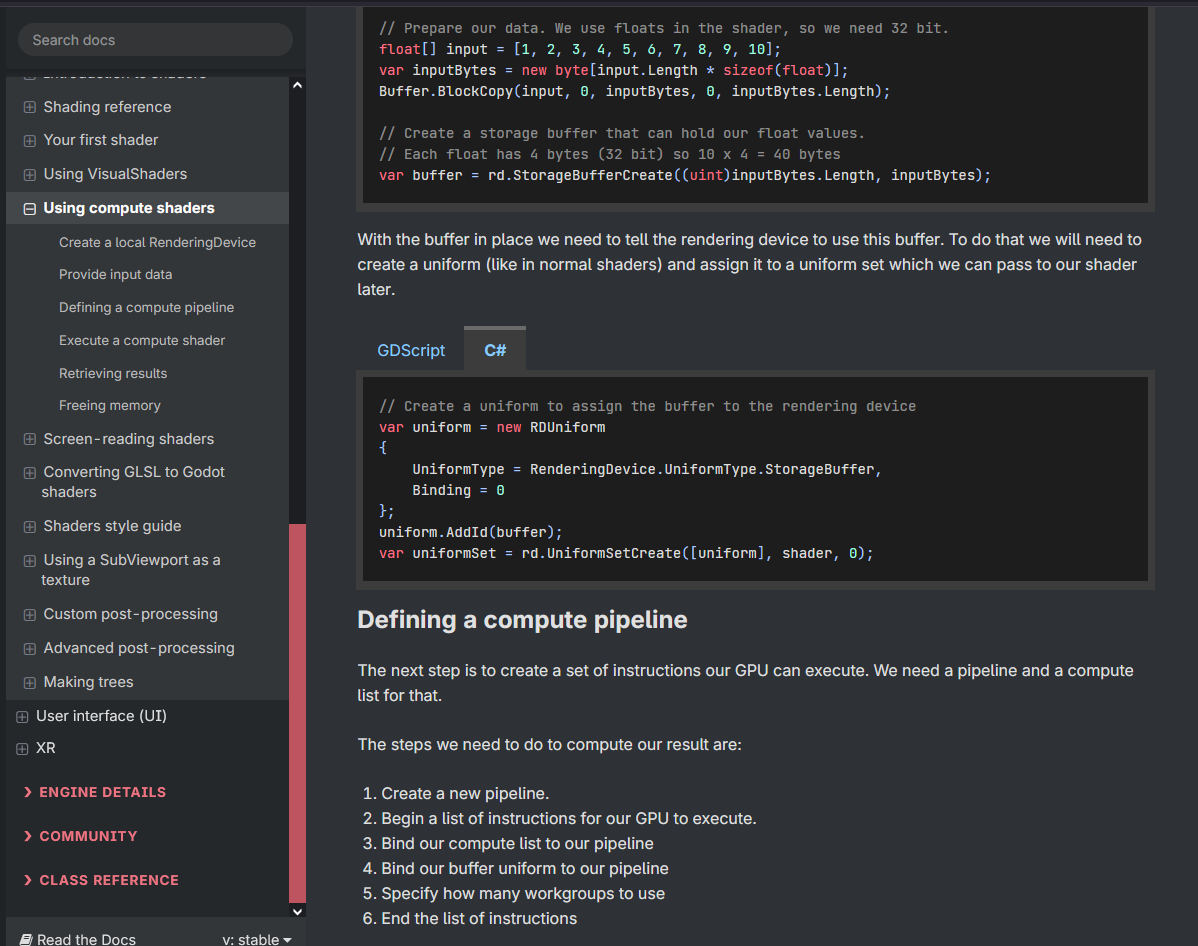
They are shockingly low-level compared to regular vertex and fragment shaders. There is a ton of manual memory management involved, uploading buffers to the GPU then downloading them back, packing data and creating byte buffers in the most efficient way possible. It was going to be quite the challenge.
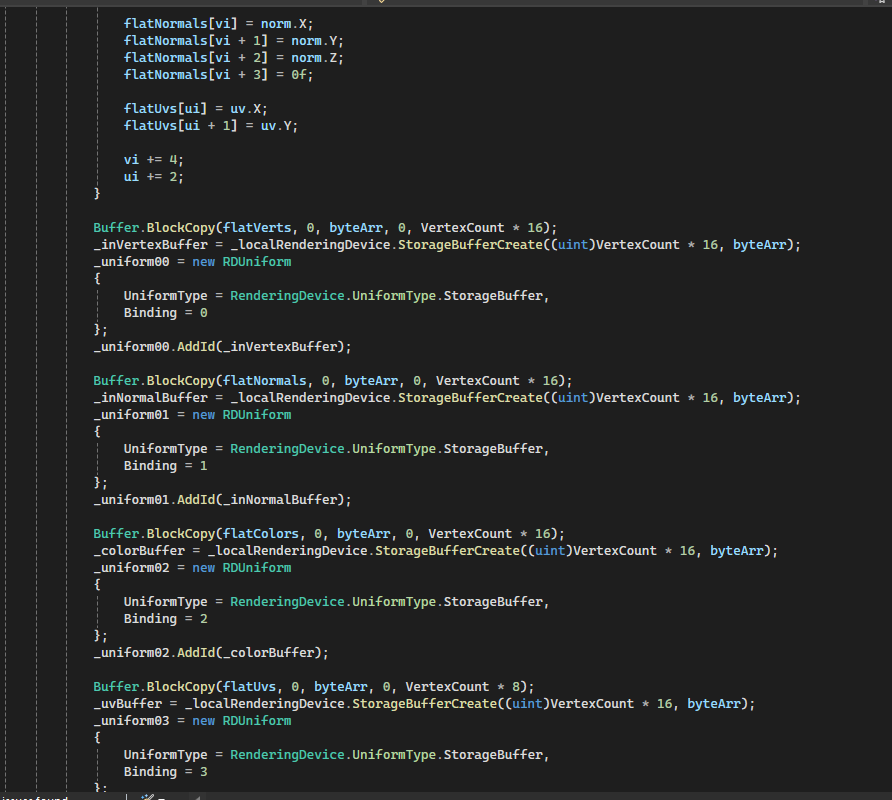
I ended up settling on a system where, for each mesh that is used by the system, it creates a HardwareMeshCache object and a HardwareMeshOutput, the former being unique to the mesh itself, and the latter being unique to the instance of the mesh. All they do is create and upload GPU buffers containing the mesh data and the output mesh data, this way it only has to be done once and everything the shader needs is already there for use.
The HardwareMeshOutput dies when the mesh instance is removed from the scene tree, while the HardwareMeshCache is C# WeakRef'd by the MorphManager class, so we avoid memory leaks by getting rid of these caches as the meshes are no longer used and memory pressure increases.
The MorphManager itself is the sort of "global orchestrator" class - When a mesh wants to use morph maps, they send a list of the ID of each morph used to the class singleton instance, it manages loading the appropriate morph maps and uploading them to the GPU, makes instances of the hardware caches if they do not exist already, and then sets up the compute shader to run.
Speaking of, the compute shader itself is relatively simple:
It simply iterates through the morph maps on each vertex and applies them based on a weight buffer. It's pretty fast!
So the shader itself really was the easy part, it's all the orchestration that takes before and after the shader runs that required a ton of thoughtful execution and a ton of trial and error.
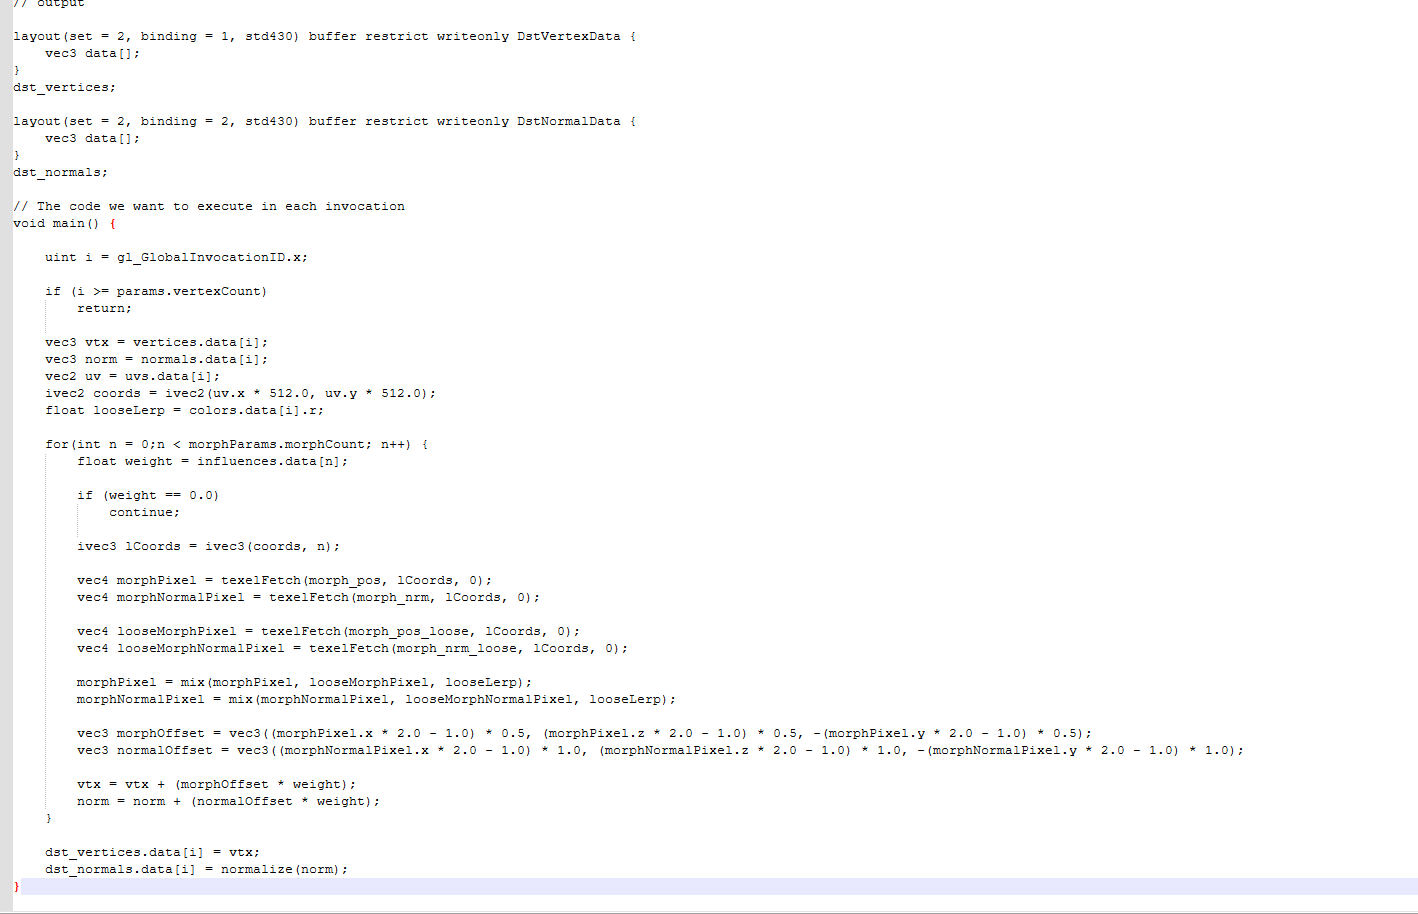
And, finally, after putting everything together...
I mean... it happens, I guess. Especially when learning something new. This was just a result of me trying to be clever and doing weird stuff in the name of optimization that the GPU really didn't like.
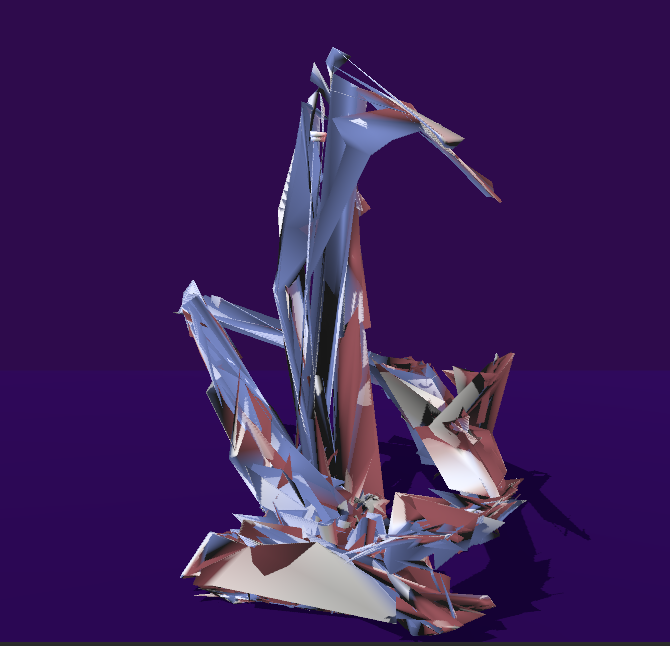
There we go! This is about 5 meshes total (Feet, Legs, Torso, Hands, Head) all randomizing its gender morph map to different values on a key press, in real time! All texture based - no blend shapes!
Worth mentioning that I made the MorphMapManager only do work about 30 times per second, cycling between dispatching work to the GPU and retrieving results from it to apply to the meshes. This is a quick way to keep it smooth in case the shader takes a bit longer we don't wait around for it and waste a few frames.
There are still ways to improve this, like packing the vertex and normal deltas into a single texture, and packing the GPU buffers tightly together, but I am really happy with the result and performance.
Finishing touches
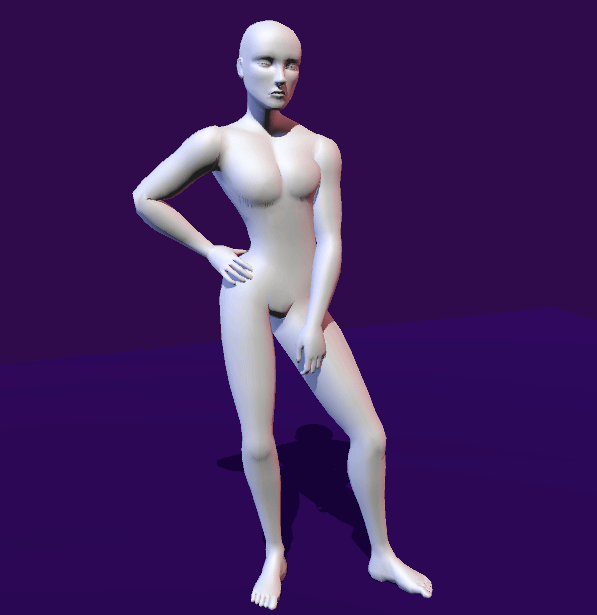
The hard part is now over, the system works, so now it's time to move on to actually trying it out with a clothing mesh.
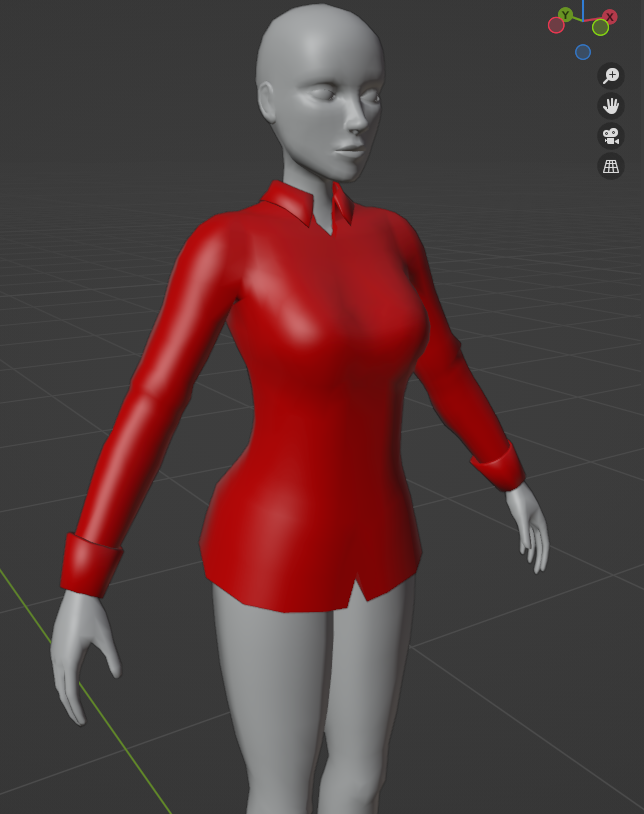
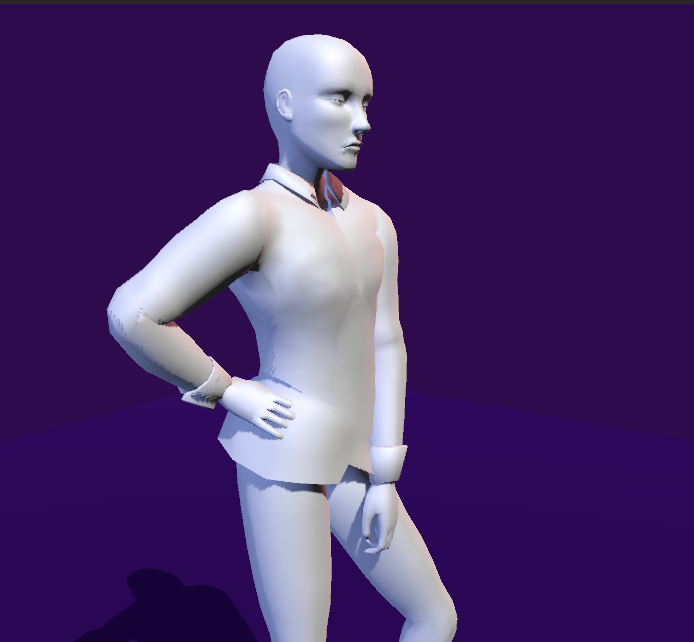
For this purpose, I made a quick little dress shirt in blender:
So, after transferring skin weights and UV Maps from the base character model, it works!
However, a key detail is that clothes aren't skin tight, so the same morph texture as the body doesn't work quite well for the shirt. You can see that especially around the cleavage/breast area, since unlike the body mesh the clothing mesh sort of "hangs loose" the result looks all kinds of messed up.
For this purpose, I created a "loose" version of the base mesh, exclusively for creating morphs:

It's not super different - It mostly comes down to making the breast shape less pronounced, plus smoothing out some other details like the shoulders and muscles.
Since some clothes can have parts that are tighter than others, instead of being a binary choice between tight or loose I decided to color code it via the vertex color channel.
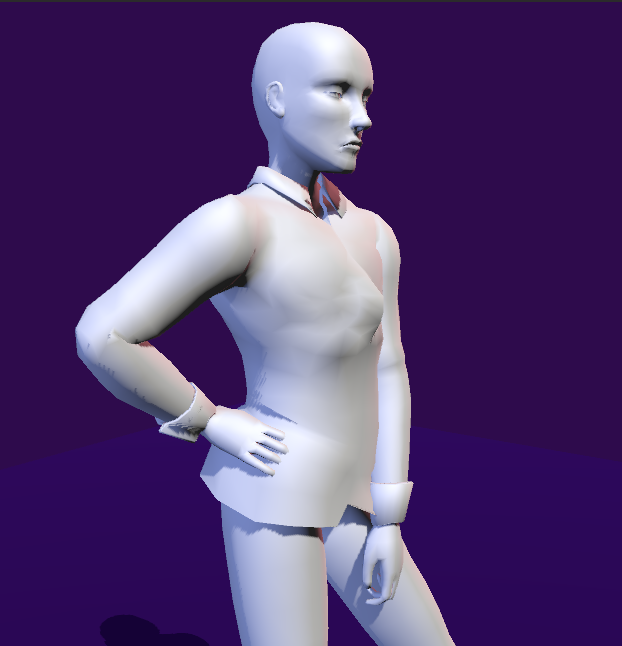
So in the red channel we encode how much the mesh should use the loose version of the morphs. In the case of the shirt it's fully red, but in other outfits like, say, wet suits and such you would probably want to blend it at key areas instead.
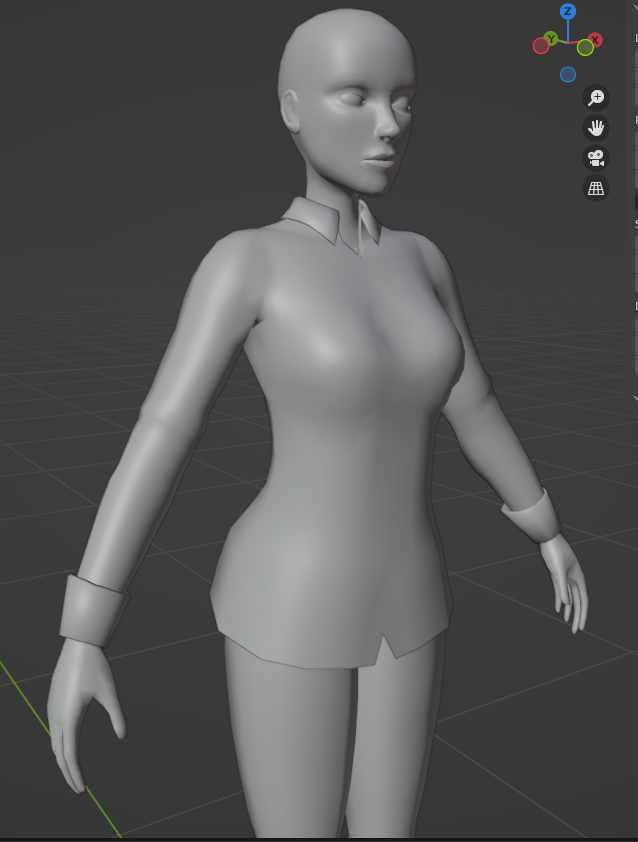
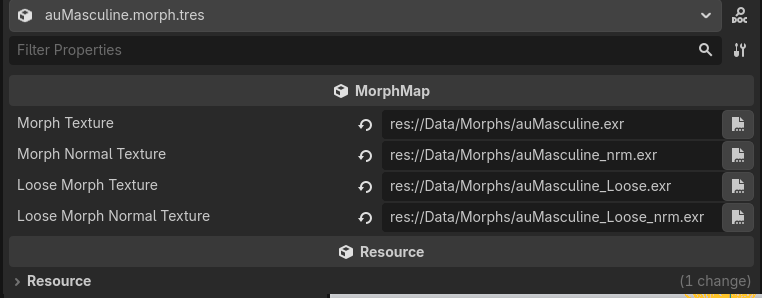
Now, every MorphMap resource in Godot can have a loose variant:
After hooking it all up, it works fantastic!
So yeah, this is where i left it off. I'm sure there are still way more optimizations I could do, like packing all the morph variants and normals into a singular texture for massive gains, but after all the work thsi took I was done for now.
So, hey, this really could make for some great character customization :)